目标
在 SAP BTP 平台上搭建基于前后端分离的 CAP 应用
本文旨在指导开发者在 SAP Business Technology Platform (BTP) 上构建一个现代化的企业级应用,采用 前后端分离架构,以前端展示与后端服务解耦的方式提升系统可维护性与扩展性。整体技术方案基于 CAP(Cloud Application Programming)模型理念,结合成熟的前端框架与后端微服务技术栈,实现高效、灵活且易于集成的应用系统。
具体而言:
- 前端项目 基于 Vue 3 + SAP UI5 Web Components ,构建语义清晰、风格统一、符合 Fiori 规范的企业级用户界面;
- 后端服务 采用 Spring Boot + MyBatis-Plus ,连接并操作 SAP HANA Cloud 数据库,提供稳定高效的 RESTful API 支持。
通过整合这两部分内容,本文将为你呈现一个完整的、可落地的 SAP BTP 应用开发实践路径。
架构概览
| 前端 | Vue 3 + Vite + SAP UI5 Web Components | 轻量级、响应式前端界面,支持 Fiori 风格组件,适用于企业管理系统 |
| 后端 | Spring Boot 3 + MyBatis-Plus + SAP HANA Cloud JDBC | 高性能微服务后端,对接 HANA Cloud 实现实时数据处理 |
| 数据库 | SAP HANA Cloud | 基于内存计算的云原生数据库,支持 OLTP 与 OLAP 混合负载 |
| 部署平台 | SAP BTP(Cloud Foundry环境) | 提供统一的身份认证、安全管控与服务集成能力 |
接上一部分:在 SAP BTP 平台上搭建基于前后端分离的 CAP 应用(第一部分)
调整前端项目
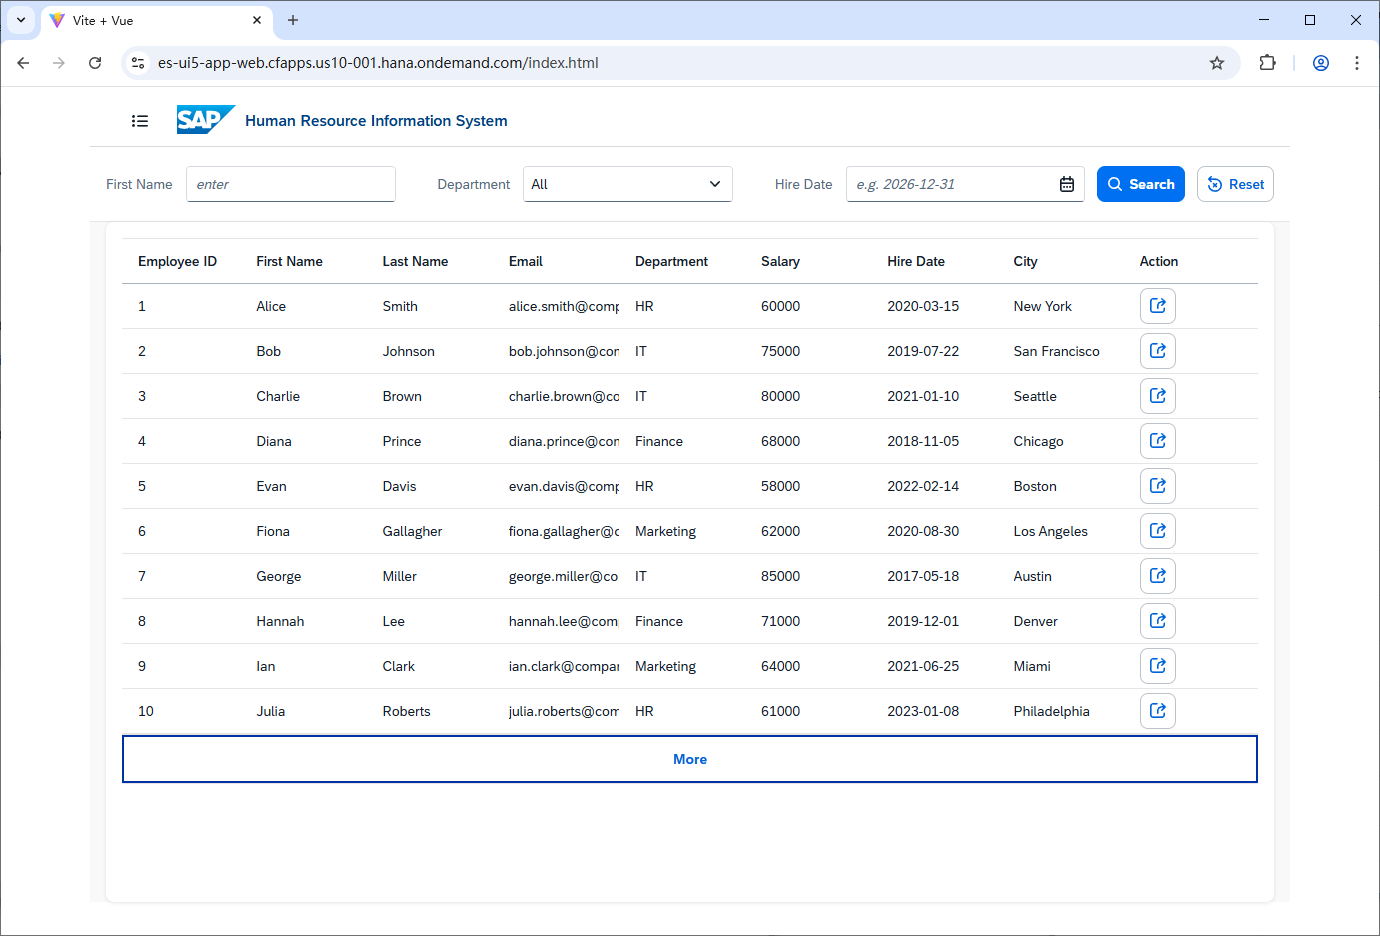
调整前端项目es-ui5-app,将数据读取方式替换为接口调用。
安装axios
npm i axios
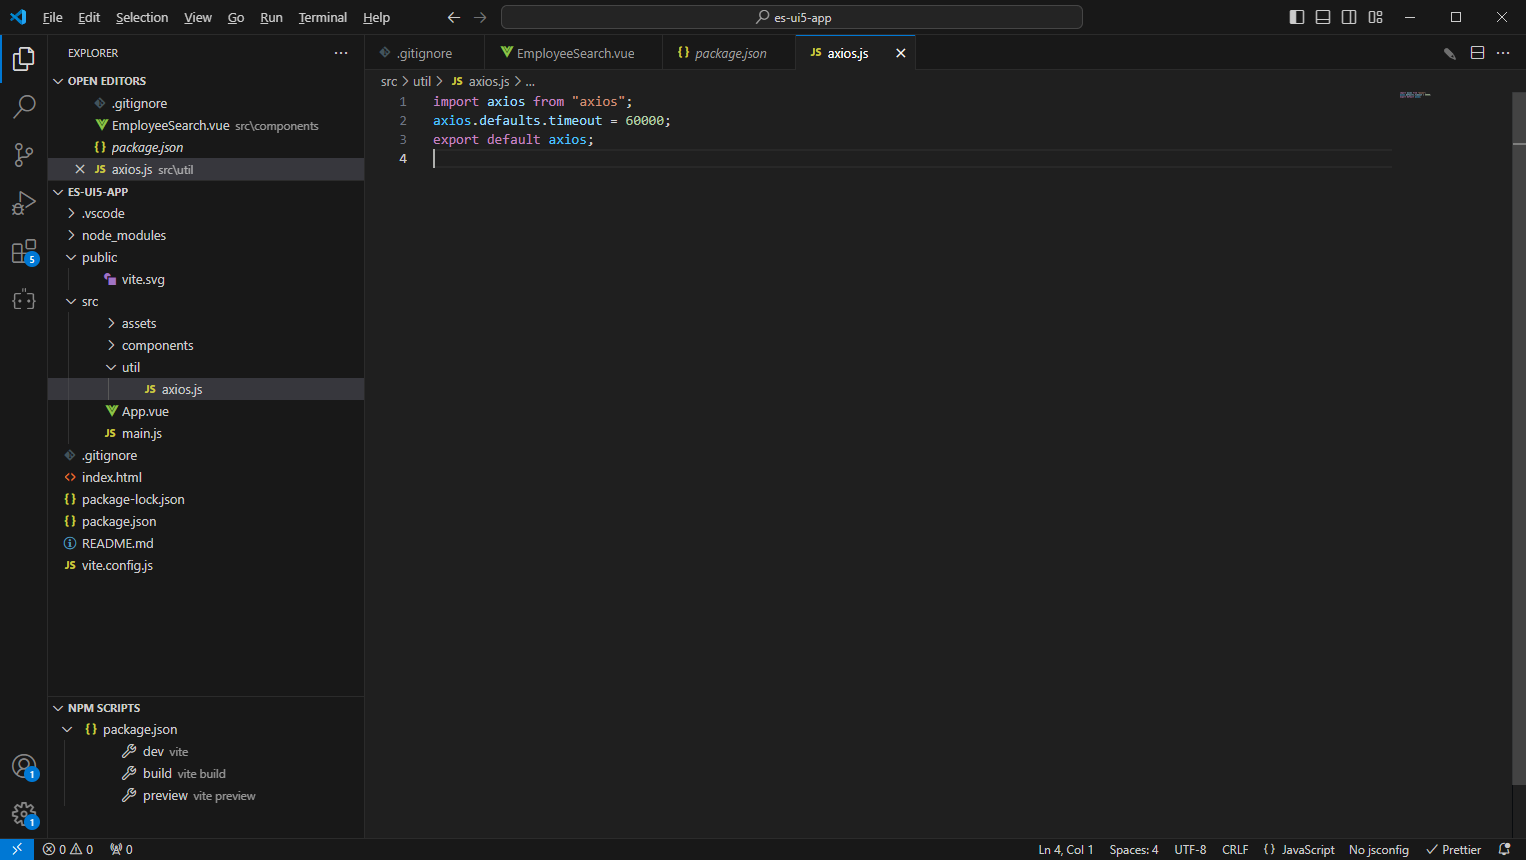
创建axios.js
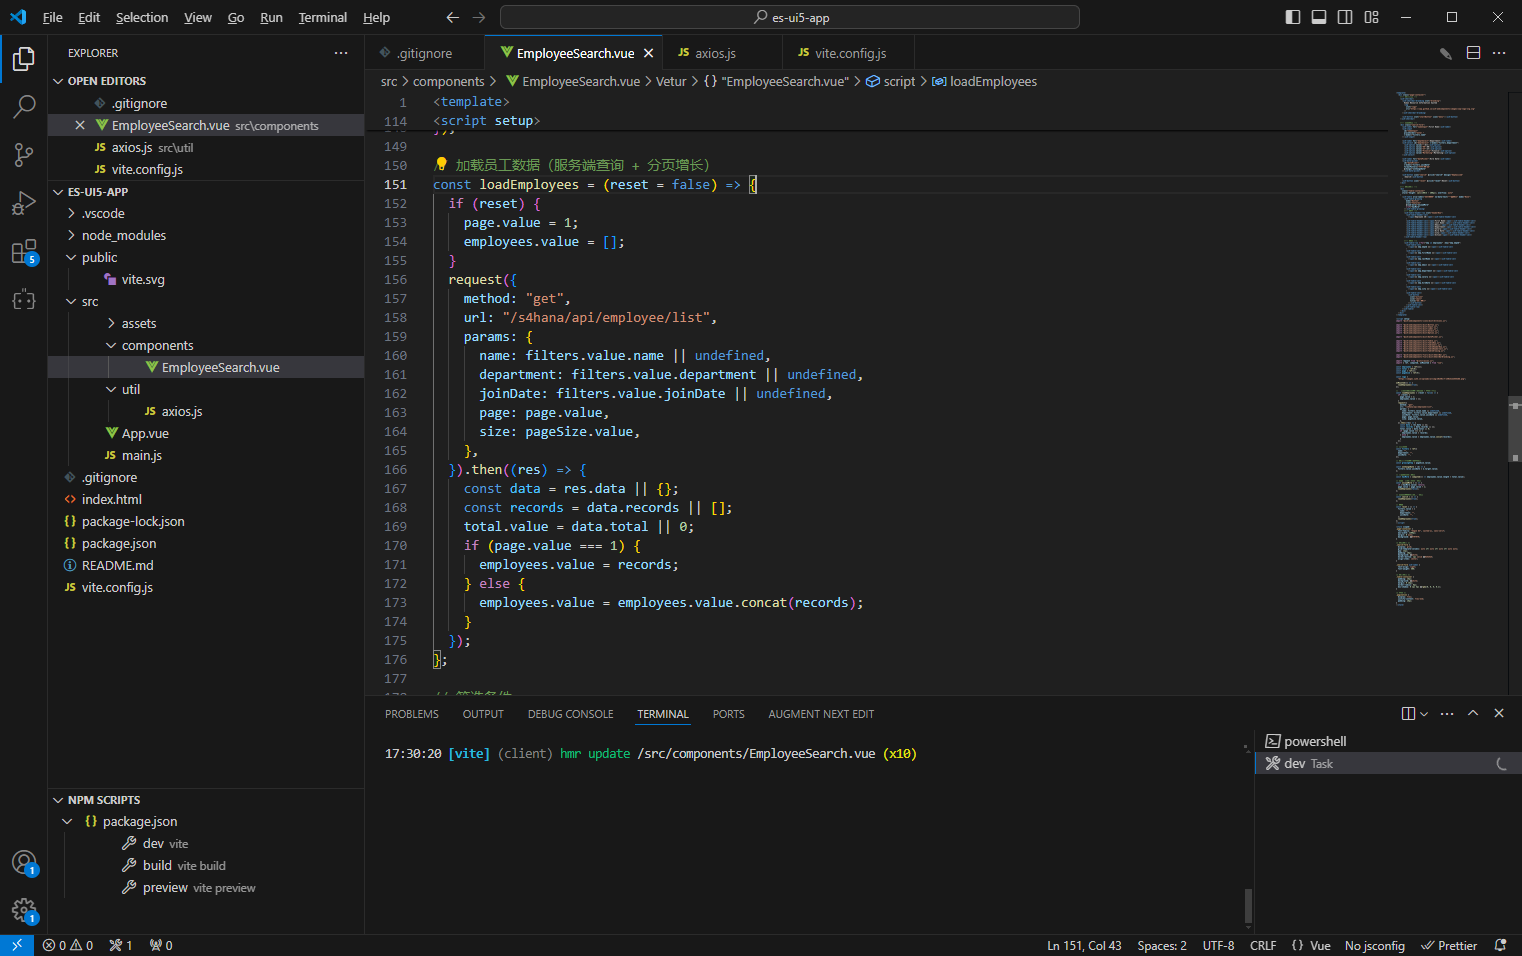
将 EmployeeSearch.vue中的模拟员工数据替换使用/api/employee/list来读取
<template>
  <div class="page-container">
    <!-- 顶部导航 -->
    <ui5-shellbar>
      <ui5-shellbar-branding slot="branding">
        Human Resource Information System
        <img
          slot="logo"
          src="https://sap.github.io/ui5-webcomponents/images/sap-logo-svg.svg"
        />
      </ui5-shellbar-branding>

      <ui5-button slot="startButton" icon="menu"></ui5-button>
    </ui5-shellbar>

    <!-- 查询表单 -->
    <div class="search-form">
      <ui5-label for="nameInput">First Name</ui5-label>
      <ui5-input
        id="nameInput"
        placeholder="enter "
        v-model="filters.name"
      ></ui5-input>

      <ui5-label for="deptSelect">Department</ui5-label>
      <ui5-select id="deptSelect" v-model="filters.department">
        <ui5-option value="">All</ui5-option>
        <ui5-option value="HR">HR</ui5-option>
        <ui5-option value="IT">IT</ui5-option>
        <ui5-option value="Finance">Finance</ui5-option>
        <ui5-option value="Marketing">Marketing</ui5-option>
      </ui5-select>

      <ui5-label for="datePicker">Hire Date</ui5-label>
      <ui5-date-picker
        id="datePicker"
        v-model="filters.joinDate"
        formatPattern="YYYY-MM-dd"
        @change="onChangeDate"
      ></ui5-date-picker>

      <ui5-button icon="search" @click="search" design="Emphasized"
        >Search</ui5-button
      >
      <ui5-button icon="reset" @click="reset">Reset</ui5-button>
    </div>

    <!-- 数据表格 -->
    <div
      class="table-container"
      style="height: calc(100vh - 200px); overflow: auto"
    >
      <ui5-table aria-label="员工列表" no-data-text="暂无数据" mode="None">
        <ui5-table-growing
          mode="Button"
          slot="features"
          @load-more="onLoadMore"
          v-if="hasMore"
        ></ui5-table-growing>
        <!-- 表头 -->
        <ui5-table-header-row slot="headerRow">
          <ui5-table-header-cell
            ><span>Employee ID</span></ui5-table-header-cell
          >
          <ui5-table-header-cell><span>First Name</span></ui5-table-header-cell>
          <ui5-table-header-cell><span>Last Name</span></ui5-table-header-cell>
          <ui5-table-header-cell><span>Email</span></ui5-table-header-cell>
          <ui5-table-header-cell><span>Department</span></ui5-table-header-cell>
          <ui5-table-header-cell><span>Salary</span></ui5-table-header-cell>
          <ui5-table-header-cell><span>Hire Date</span></ui5-table-header-cell>
          <ui5-table-header-cell><span>City</span></ui5-table-header-cell>
          <ui5-table-header-cell><span>Action</span></ui5-table-header-cell>
        </ui5-table-header-row>

        <!-- 表体 -->
        <ui5-table-row v-for="emp in employees" :key="emp.empId">
          <ui5-table-cell
            ><span>{{ emp.empId }}</span></ui5-table-cell
          >
          <ui5-table-cell
            ><span>{{ emp.firstName }}</span></ui5-table-cell
          >
          <ui5-table-cell
            ><span>{{ emp.lastName }}</span></ui5-table-cell
          >
          <ui5-table-cell
            ><span>{{ emp.email }}</span></ui5-table-cell
          >
          <ui5-table-cell
            ><span>{{ emp.department }}</span></ui5-table-cell
          >
          <ui5-table-cell
            ><span>{{ emp.salary }}</span></ui5-table-cell
          >
          <ui5-table-cell
            ><span>{{ emp.hireDate }}</span></ui5-table-cell
          >
          <ui5-table-cell
            ><span>{{ emp.city }}</span></ui5-table-cell
          >
          <ui5-table-cell>
            <ui5-button
              icon="action"
              size="small"
              title="更多操作"
            ></ui5-button>
          </ui5-table-cell>
        </ui5-table-row>
      </ui5-table>
    </div>
  </div>
</template>

<script setup>
import "@ui5/webcomponents-icons/dist/AllIcons.js";

import "@ui5/webcomponents/dist/Button.js";
import "@ui5/webcomponents/dist/Input.js";
import "@ui5/webcomponents/dist/Label.js";
import "@ui5/webcomponents/dist/Select.js";
import "@ui5/webcomponents/dist/Option.js";

import "@ui5/webcomponents/dist/DatePicker.js";

import "@ui5/webcomponents/dist/Table.js";
import "@ui5/webcomponents/dist/TableRow.js";
import "@ui5/webcomponents/dist/TableCell.js";
import "@ui5/webcomponents/dist/TableHeaderRow.js";
import "@ui5/webcomponents/dist/TableHeaderCell.js";
import "@ui5/webcomponents/dist/TableGrowing.js";

import "@ui5/webcomponents-fiori/dist/ShellBar.js";
import "@ui5/webcomponents-fiori/dist/ShellBarBranding.js";

import request from "@/util/axios.js";
import { ref, computed, onMounted } from "vue";

const employees = ref([]);
const total = ref(0);
const page = ref(1);
const pageSize = ref(5);

const logo =
  "https://images.sj33.cn/uploads/allimg/201401/7-140131225442O6.png";

onMounted(() => {
  loadEmployees(true);
});

// 加载员工数据(服务端查询 + 分页增长)
const loadEmployees = (reset = false) => {
  if (reset) {
    page.value = 1;
    employees.value = [];
  }
  request({
    method: "get",
    url: "/s4hana/api/employee/list",
    params: {
      name: filters.value.name || undefined,
      department: filters.value.department || undefined,
      joinDate: filters.value.joinDate || undefined,
      page: page.value,
      size: pageSize.value,
    },
  }).then((res) => {
    const data = res.data || {};
    const records = data.records || [];
    total.value = data.total || 0;
    if (page.value === 1) {
      employees.value = records;
    } else {
      employees.value = employees.value.concat(records);
    }
  });
};

// 筛选条件
const filters = ref({
  name: "",
  department: "",
  joinDate: "",
});

// 表格增长(服务端分页)
const growingStep = pageSize.value;

const onChangeDate = (e) => {
  filters.value.joinDate = e.target.value;
};

// 是否还有更多数据
const hasMore = computed(() => employees.value.length < total.value);

// 处理加载更多(下一页)
const onLoadMore = () => {
  if (!hasMore.value) return;
  page.value = page.value + 1;
  loadEmployees(false);
};

// 查询(重置并拉取第一页)
const search = () => {
  loadEmployees(true);
};

// 重置
const reset = () => {
  filters.value = {
    name: "",
    department: "",
    joinDate: "",
  };
  loadEmployees(true);
};
</script>

<style scoped>
.page-container {
  font-family: "Segoe UI", system-ui, sans-serif;
  max-width: 1200px;
  margin: 0 auto;
  background: #f9f9f9;
}

/* 表单样式 */
.search-form {
  display: grid;
  grid-template-columns: auto 1fr auto 1fr auto 1fr auto auto;
  gap: 12px;
  padding: 16px;
  background: white;
  border-bottom: 1px solid #e5e5e5;
  align-items: center;
}

.search-form ui5-label {
  text-align: right;
  font-weight: 500;
}

/* 表格容器 */
.table-container {
  padding: 16px;
  background: white;
  margin: 0 16px;
  border-radius: 8px;
  box-shadow: 0 1px 4px rgba(0, 0, 0, 0.1);
}

/* 分页 */
.pagination {
  display: flex;
  justify-content: flex-end;
  padding: 16px;
}
</style>
2. 本地测试前后端联通
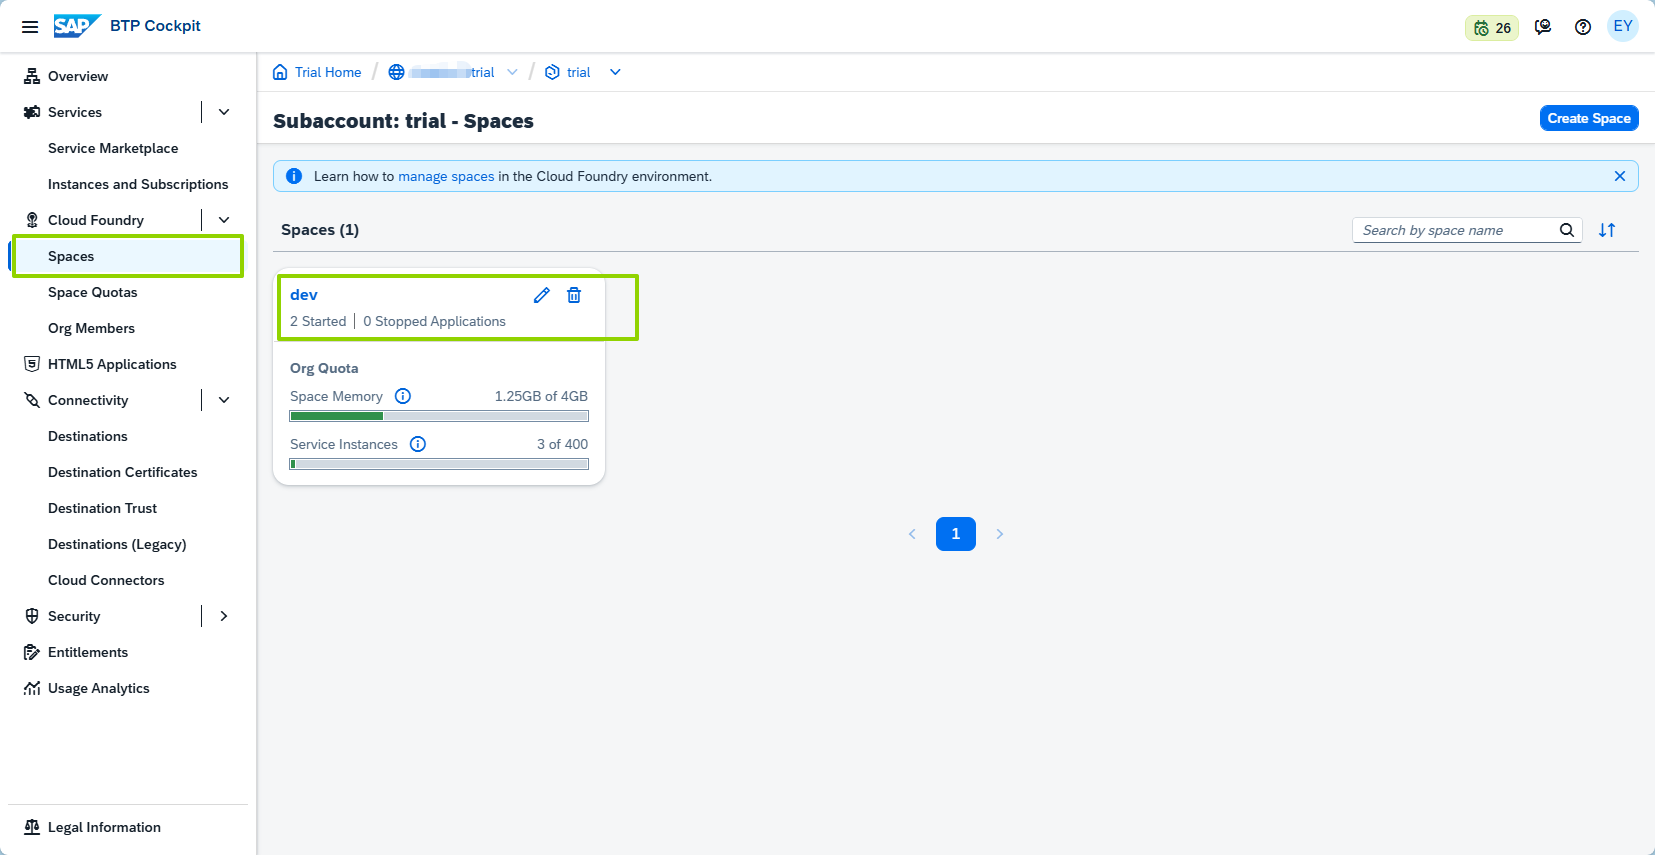
3. 新建一个nodejs server项目
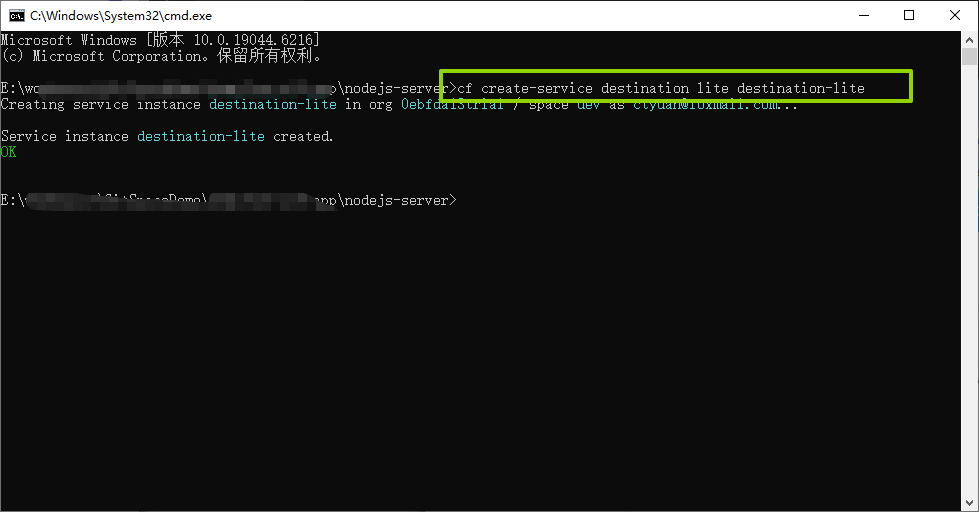
4. 创建 destination-lite 服务实例
在 SAP Business Technology Platform (BTP) 上创建 destination-lite 服务实例,需要以下步骤。这个服务实例是基于 Destination 服务(Destination Service) 的 lite 计划创建的,用于让你的应用(如 Node.js、UI5、CAP 应用)安全连接到外部系统(如 S/4HANA、SuccessFactors 等)。
cf create-service destination lite destination-lite
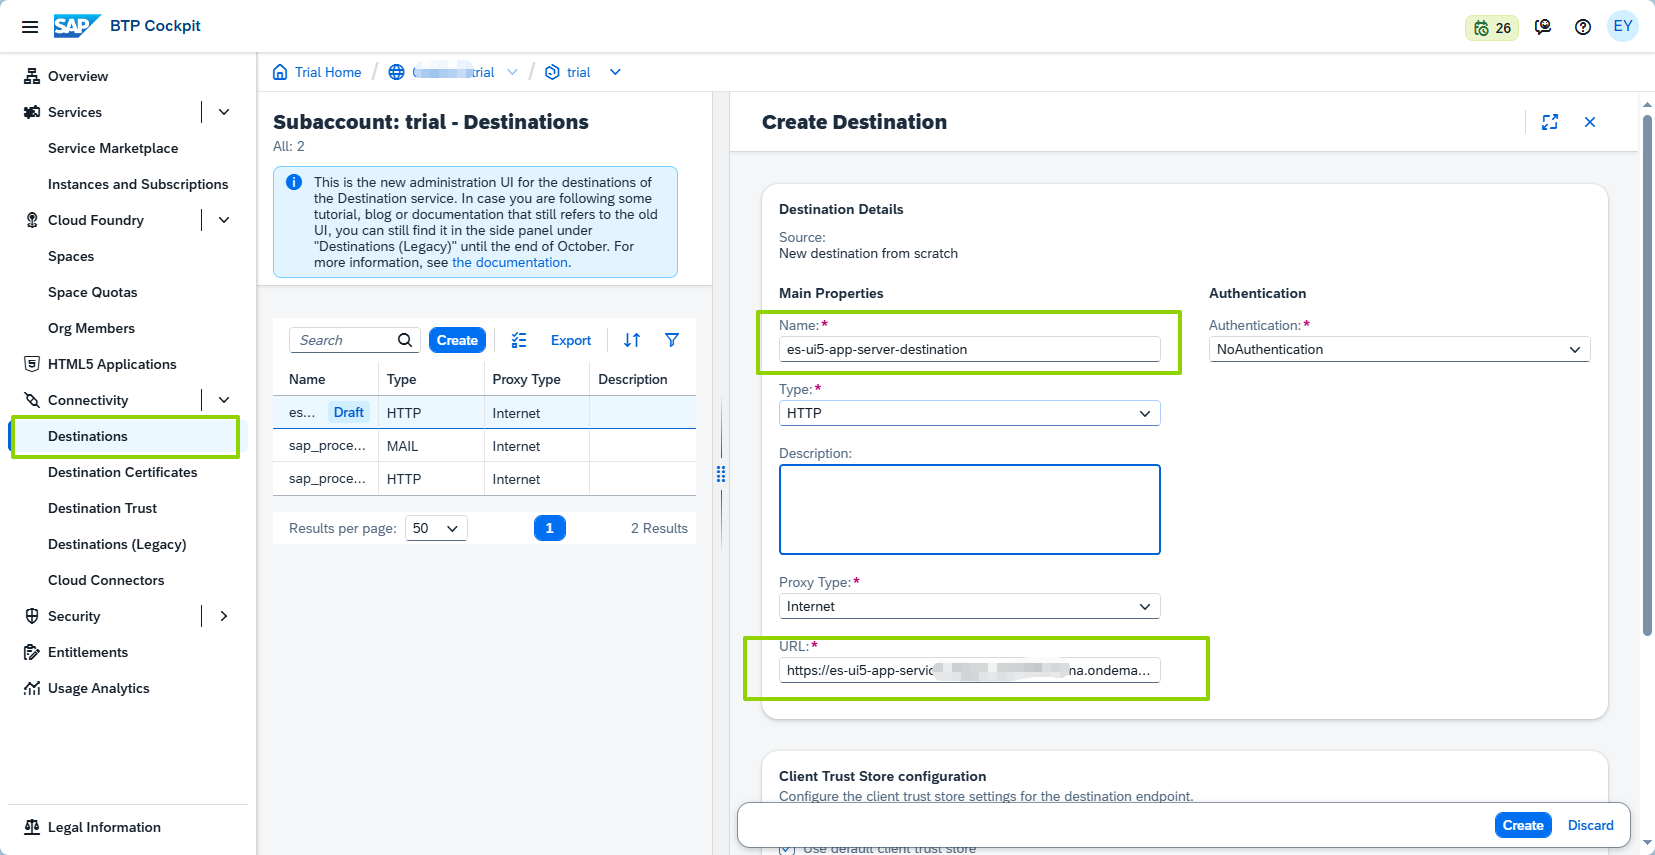
5. 在BTP新建一个Destination
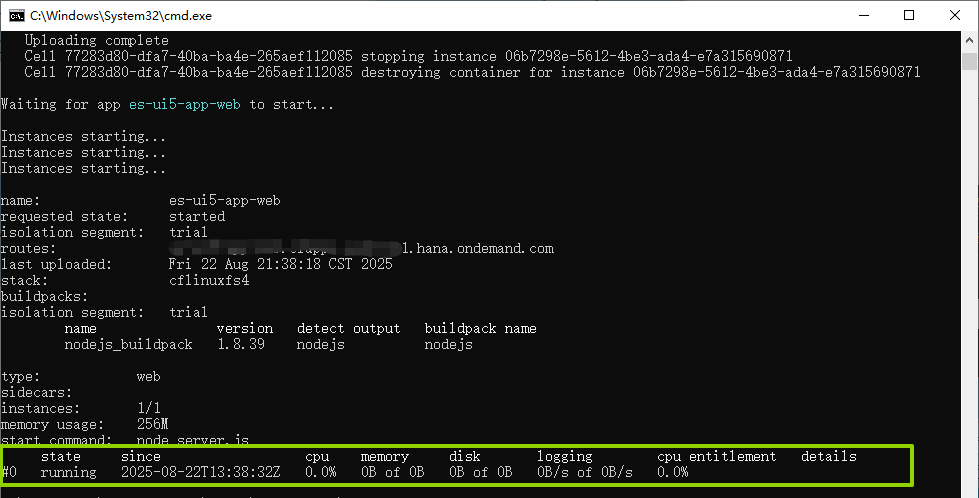
5. 提交到Cloud Foundry
cf push
6. 获取前端访问地址
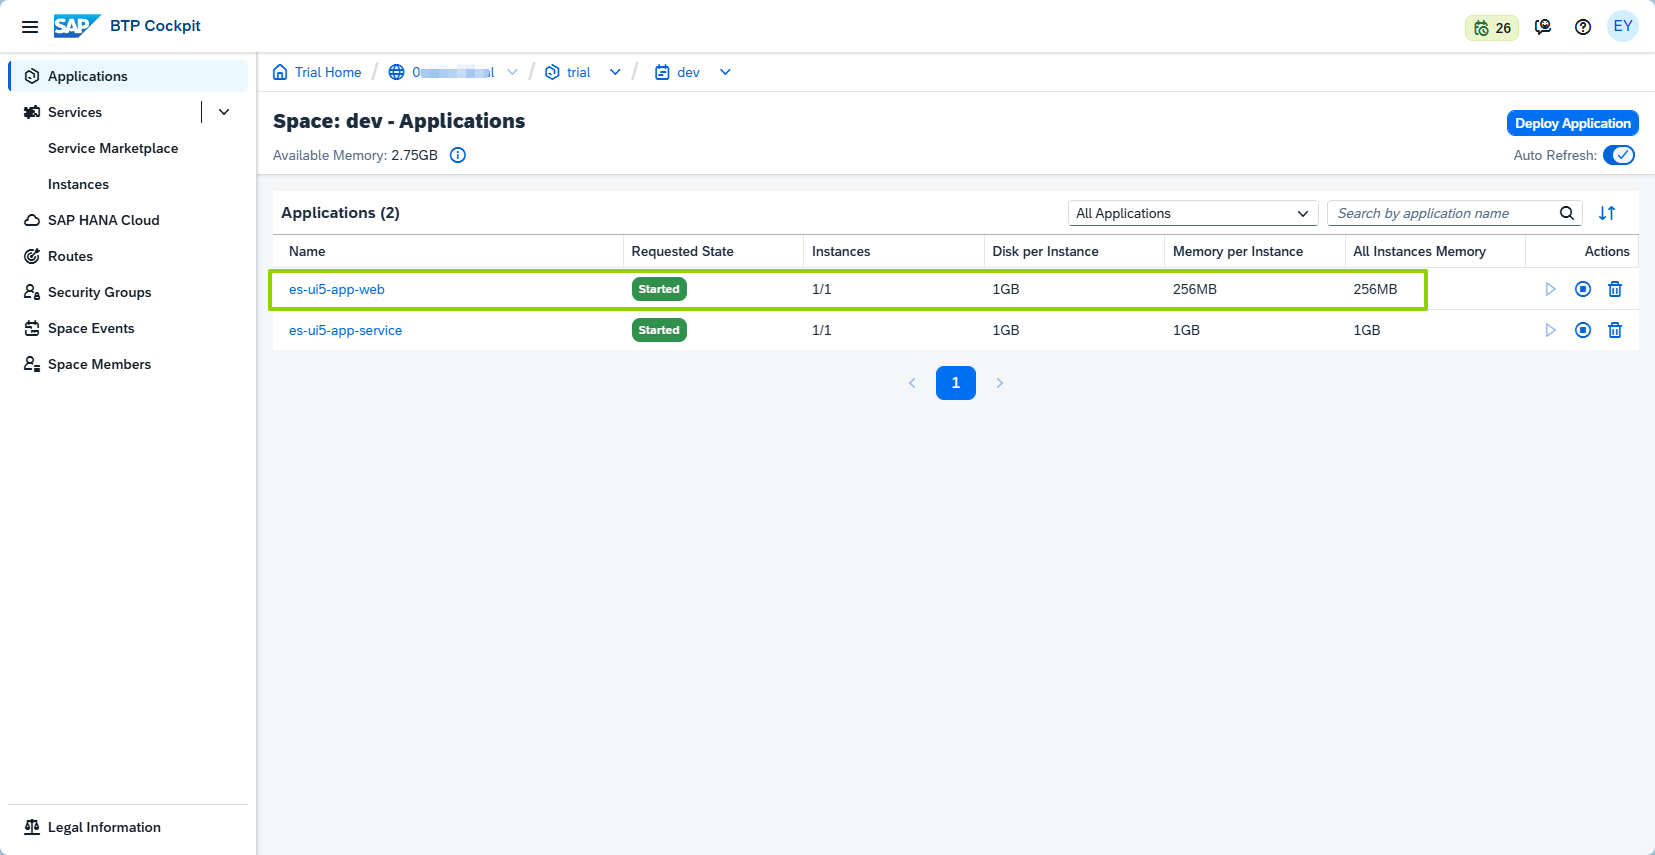
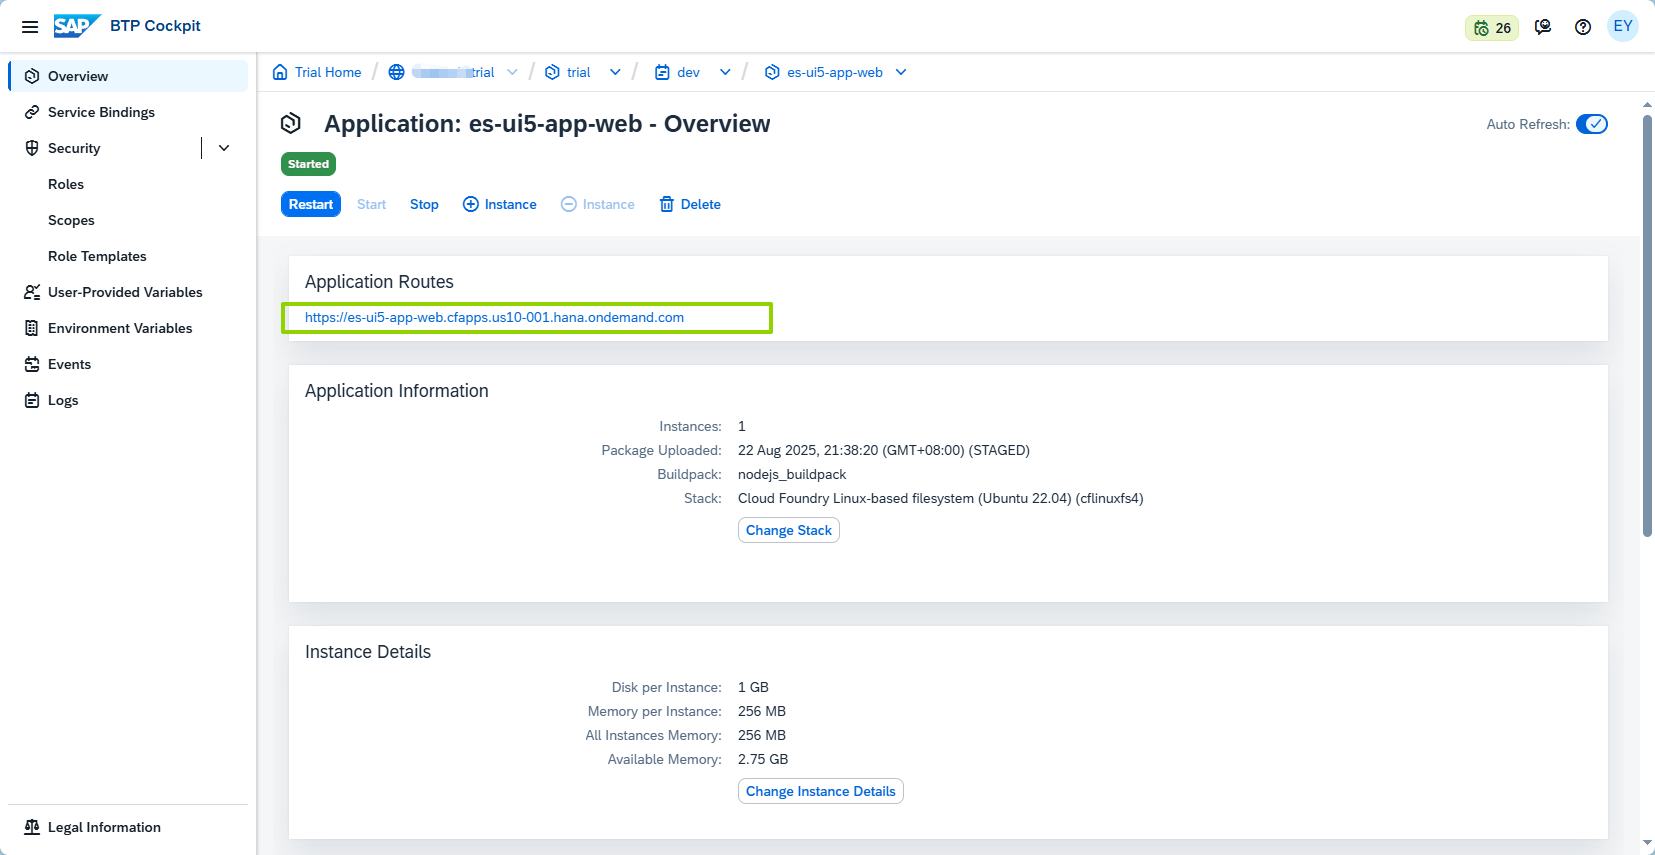
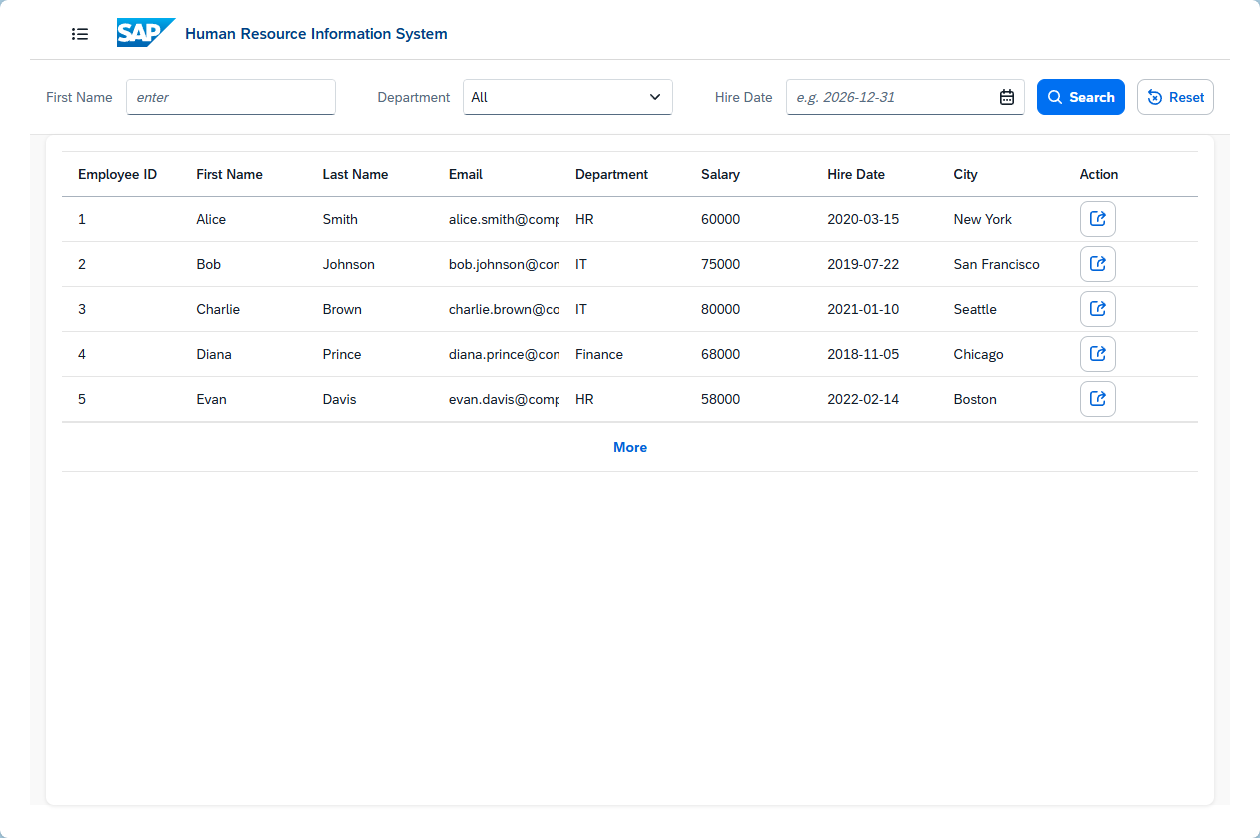
页面正常访问,并能获取到数据
人物A 回复
这是回复
人物B 回复
我回复你了
人物A 回复
回复已收到